Screenshots show WARDOGS Kit, not the in-game vendor. The linked example already has a loaded primary and one spare. It is a practice template, not a claim about the strongest current build.
1. Match the weapon, magazine and cartridge
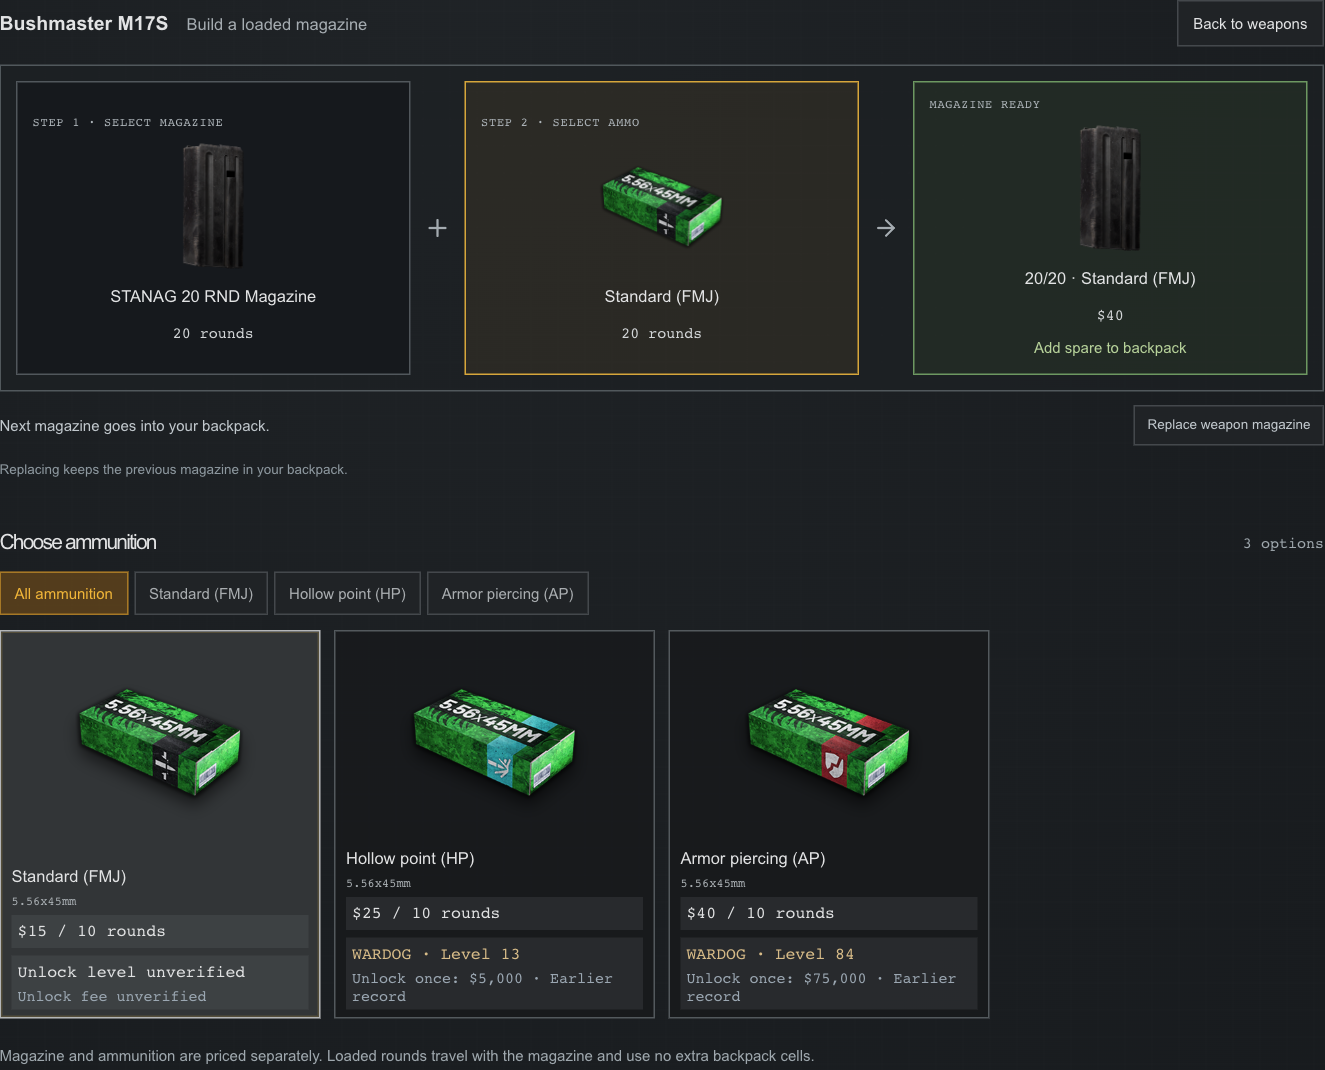
Open the Weapons tab in the loadout simulator. Select the primary slot and choose a weapon. The Ammo button opens the magazine workbench for that exact slot. The catalog filters compatible magazines; a matching caliber alone does not make every magazine fit.
Read access requirements as well as the listed price. A free unlock and a free deployment purchase are different things. The simulator shows recorded information, so confirm the current vendor if a price or gate differs.
- Choose the magazine first; its capacity appears in the first panel.
- Choose the ammunition in the second panel. FMJ, HP and AP are categories, not interchangeable calibers.
- Check the ready panel before adding the magazine.
2. Separate the loaded magazine from ready spares
With an empty weapon, the ready action is “Load into weapon.” Once a magazine is loaded, the action becomes “Add spare to backpack.” If storage is missing, the simulator asks you to choose a backpack while preserving your selection.
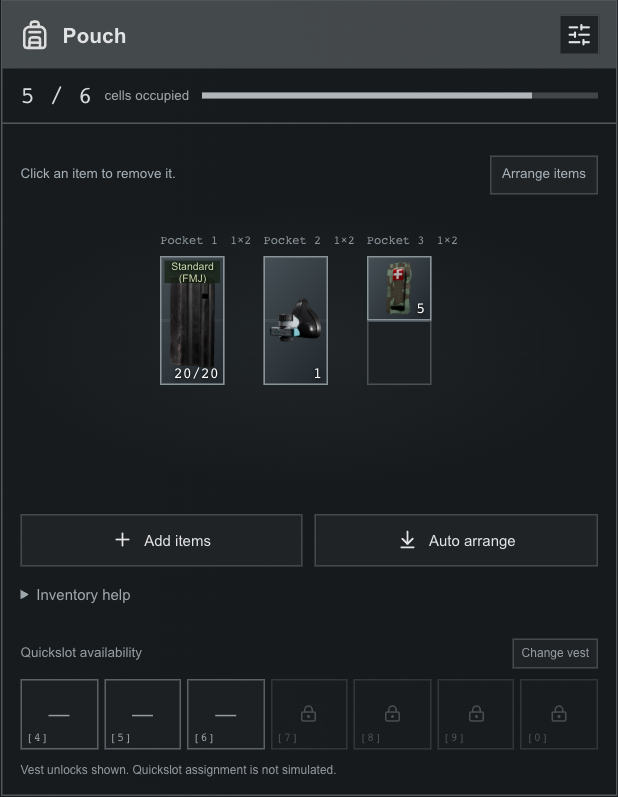
Check the round badge on the weapon card and the separate magazine icon in the backpack. A spare should have a visible round count and ammunition type. Use “Replace weapon magazine” when changing the loaded ammunition; the simulator keeps the previous magazine in storage if it fits.
3. Add loose rounds after ready magazines
Open Loose ammunition, choose the compatible weapon filter and add the cartridge you intend to carry. In this simulator, each click buys the catalog bundle shown on the card; the quantity field multiplies that bundle. Inspect the actual number of rounds rather than treating one click as one bullet.
Loose rounds and a loaded spare are different inventory states. In game, check the current inventory prompt and your key bindings for replenishing magazines. This website plans supplies; it does not simulate combat reload timing or refill animations.
4. Check the finished kit
Before sharing, review the primary’s loaded magazine, ready spare count, loose ammunition, medical supplies, total cost and weight. Open weight details to see the current modeled class. A “+ ?” means the calculation is incomplete.
Copy link preserves the current equipment, attachments and packed contents. Save image exports a readable summary for chat. For a reusable starting point, open a role guide, select Budget, Regular or Full, and choose Open in simulator.
Common questions
Why is the gun still empty after adding loose ammo?
Loose ammo is placed in the backpack. Use the weapon’s Ammo workbench to select a magazine, select compatible rounds and load the prepared magazine.
Why can I not add another spare?
Check storage first. The simulator requires a suitable backpack and enough space for the magazine footprint; free cells spread across separate pockets may not fit it.
Is AP always the best choice?
No universal recommendation is made here. Compare the same weapon, target, armor, distance and data version in the damage calculator before choosing ammunition.
Sources & scope
Steps are checked against the current tools on this site. External references provide game context; missing fields and version limits remain visible in the tools and source notes.