The example uses invented practice positions, not recommended firing locations or enemy routes. Screenshots show our calculator. No live match information is read.
1. Choose the map and weapon
Choose Bakurani, Ozeti or Zestafona. Select L81 Mortar in Weapon system; SPH-2 uses a different firing table. Switching maps resets the plotted positions so coordinates from one map are not silently reused.
On a phone, pinch with two fingers to zoom and drag to pan. On desktop, use the mouse wheel or the + and − buttons. Tower labels and the tower index help orient the map, but a tower is only a fixed landmark.
2. Set the gun first, then the target
Select Place gun and tap the gun’s actual map position. Select Place target before tapping the intended target. On mobile these buttons sit above the map; on desktop they are under Weapon system.
For precise entry, use the four coordinate fields. X increases east and Y increases north. The fields are map units, not meters: one unit corresponds to 100 meters in this tool.
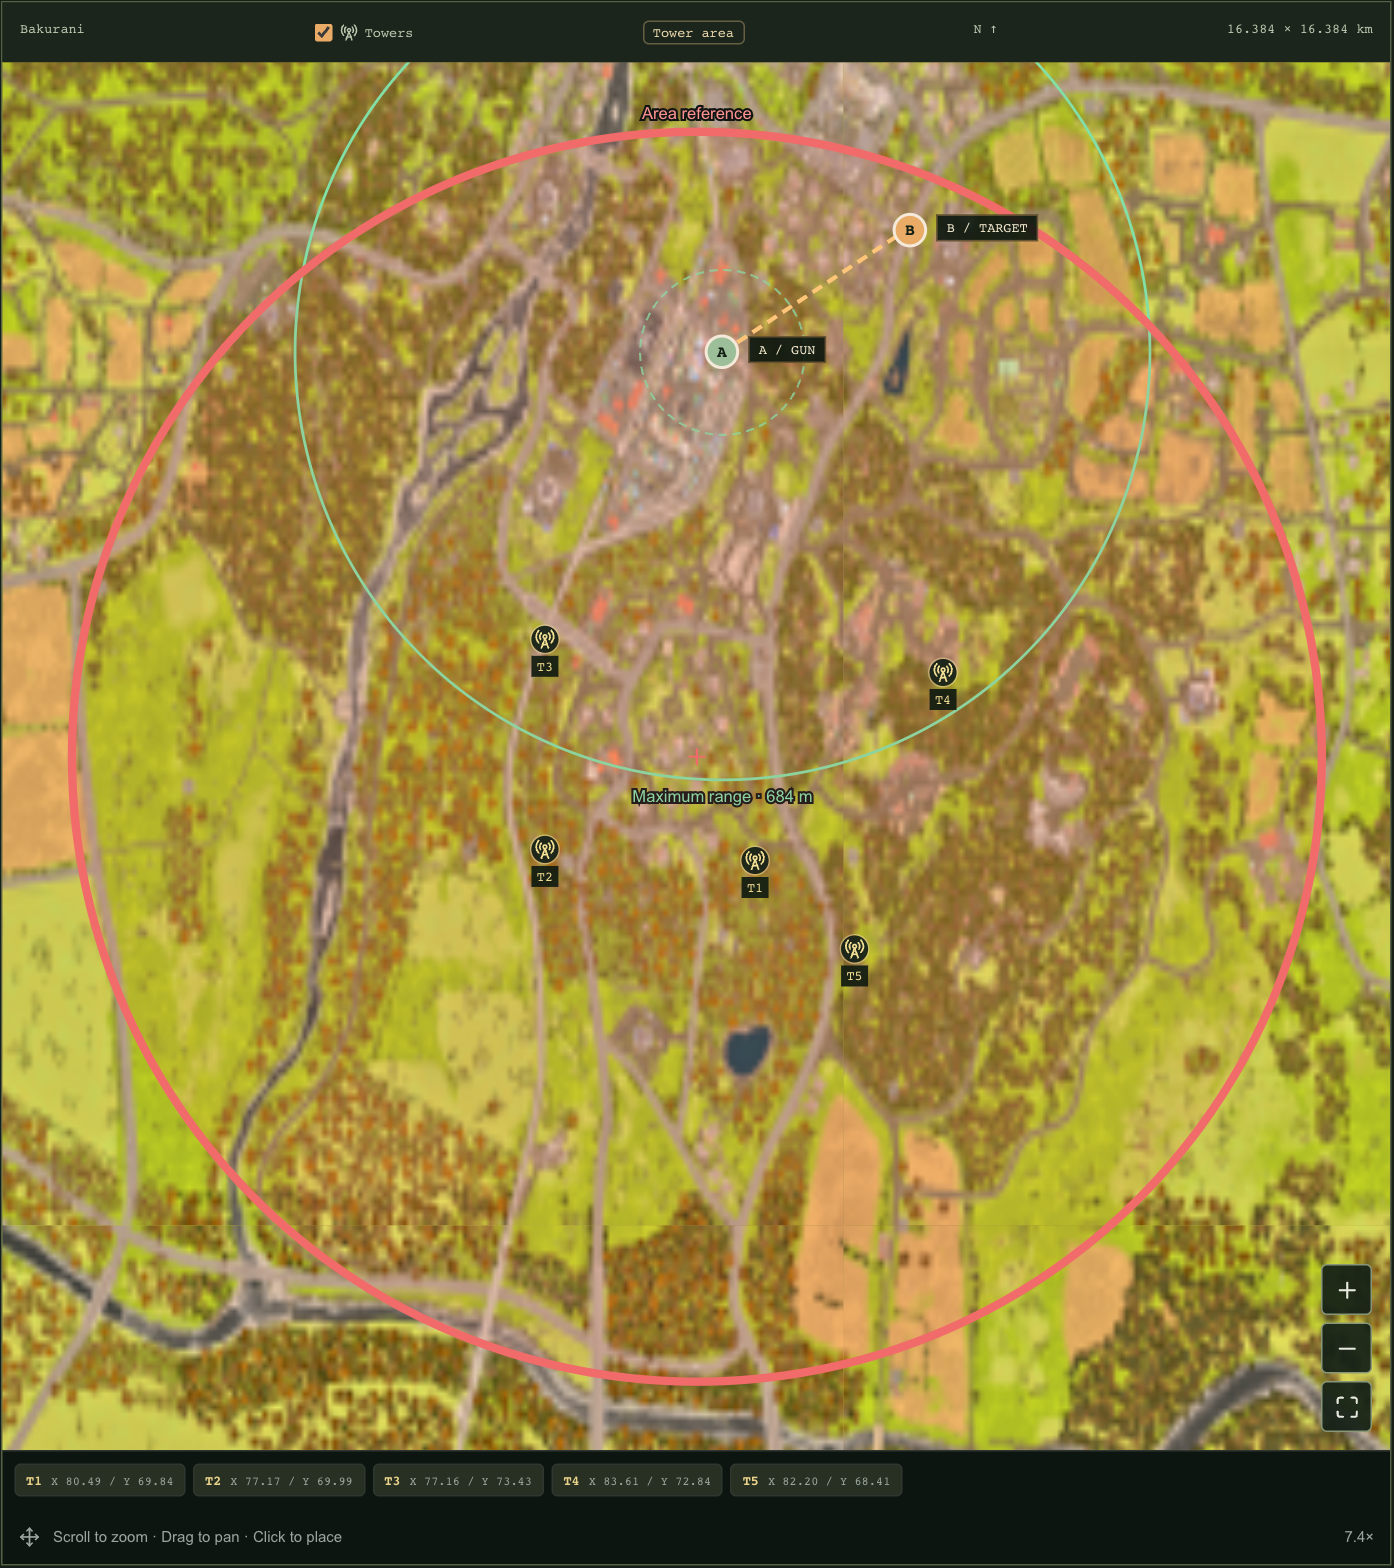
- Example gun: X 80, Y 78.
- Example target: X 83, Y 80.
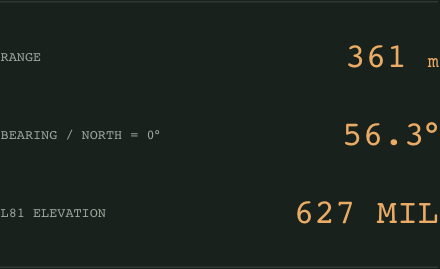
- The offset is 300 meters east and 200 meters north: about 361 meters at a bearing of 56.3° from north.
3. Read each circle correctly
The thick red circle is a fixed, approximate area reference. Choosing a control zone adds a separate white circle; it does not replace the red one. These are reference overlays, not live ownership or enemy detection.
After setting a gun position, a solid green circle shows the selected weapon’s maximum table range and a dashed green circle marks minimum range. Being inside the range envelope does not verify line of fire, terrain clearance or platform setup.
4. Read the bearing and elevation
Range is reported in meters. Bearing uses north as 0°; L81 elevation is shown in MIL. Do not enter the compass bearing as the elevation. Copy firing note produces a compact text summary for your squad.
If elevation is unavailable, first confirm all four coordinates and the selected weapon. The point may be outside the supported table. The calculator does not solve height differences, platform tilt, obstacles or shell flight time, so verify the setup and observe the result in game before relying on repeated shots.
Common questions
Are the red and white circles enemy locations?
No. They are area references. The calculator has no live connection to your match.
Can I tap a tower to set coordinates?
Yes. It fills whichever position mode is active. Select Place gun or Place target first, then use the tower marker or index.
Does green range mean the shot will hit?
No. It only represents the configured range envelope. Terrain, platform setup and other conditions can still affect the result.
Sources & scope
Steps are checked against the current tools on this site. External references provide game context; missing fields and version limits remain visible in the tools and source notes.